 Pinterest
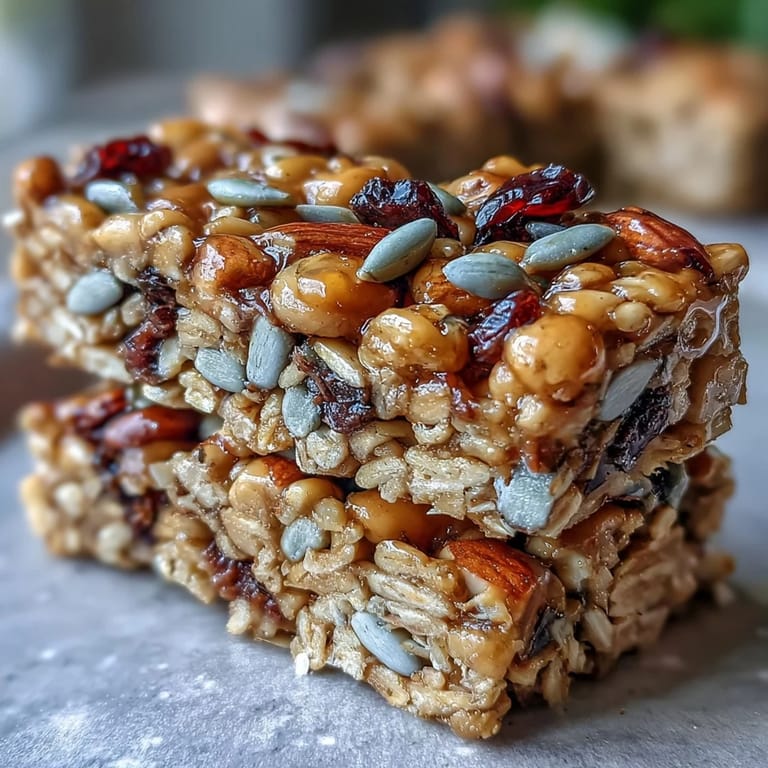
 My kitchen smelled like a farmers market collided with a candy shop the afternoon I first threw these bars together—honey warming on the stove, toasted nuts tumbling into a bowl, and somehow my hands ended up sticky before I'd even mixed anything. I was hunting for something that tasted indulgent but didn't require me to feel guilty, and these bars became the answer that stuck around. They've since traveled in backpacks, survived road trips, and convinced at least three people that snacking could be both delicious and actually nourishing.
I remember bringing a batch to a hiking trip last summer, watching everyone devour them halfway up the trail while complaining about how their store-bought granola bars turned to dust in their pockets. These stayed intact, chewy, and genuinely satisfying—and I realized then that homemade meant something real, something that held together when it mattered.
Ingredients
- Old-fashioned rolled oats (2 cups): Don't grab instant—they'll turn to mush. Rolled oats give you that pleasant chew and texture that keeps these bars interesting bite after bite.
- Mixed nuts, chopped (1/2 cup): Almonds, walnuts, pecans—pick whatever you love or have on hand. Nuts anchor the bars with protein and a satisfying crunch that keeps things from being one-note.
- Seeds (1/3 cup sunflower or pumpkin): These add subtle nuttiness and a little structural magic that holds everything together better than you'd expect.
- Dried fruit (1/2 cup cranberries or raisins): Tart cranberries brighten the whole thing, while raisins lean sweet—choose based on your mood.
- Mini chocolate chips, optional (1/4 cup): They're not essential, but they're the reason some people make these bars twice in one week.
- Honey (1/3 cup): The binding agent that actually tastes like something, turning the bars from dry to lusciously chewy. Don't substitute with syrup if you can help it.
- Unsalted butter (1/4 cup): Brings richness without overpowering the honey and oats. Measure carefully—too much and they'll be greasy, too little and they'll crumble.
- Light brown sugar, packed (1/4 cup): The molasses in brown sugar gives depth and helps bind everything into bars that actually hold their shape.
- Vanilla extract (1/2 tsp): A whisper of warmth that ties all the flavors together without announcing itself.
- Salt (1/4 tsp): This tiny amount is doing more work than you think—it balances the sweetness and makes every flavor pop.
Tired of Takeout? 🥡
Get 10 meals you can make faster than delivery arrives. Seriously.
One email. No spam. Unsubscribe anytime.
Instructions
- Heat your oven and prep the pan:
- Get your oven to 350°F and line that 8-inch square pan with parchment paper, letting some hang over the edges so you can lift the whole block out later without wrestling it. This step saves you from bar-removal frustration and is absolutely worth the 30 seconds.
- Combine all the dry ingredients:
- Toss the oats, nuts, seeds, dried fruit, and chocolate chips (if you're using them) into a large bowl and give everything a gentle mix. You're just getting acquainted here, making sure nothing's clumped.
- Melt the binding mixture:
- In a small saucepan over medium heat, warm the butter, honey, and brown sugar together, stirring occasionally until it's smooth and the sugar has dissolved. Once it's melted and glossy, remove it from heat and stir in the vanilla and salt—let it cool for just a minute while you appreciate how good it smells.
- Combine wet and dry:
- Pour that warm mixture over your dry ingredients and stir until absolutely everything is coated in the honey-butter goodness. This is where the magic happens—keep stirring until you don't see any dry oats peeking through.
- Press it into the pan:
- Transfer the whole mixture into your prepared pan and use a spatula (or clean hands, honestly) to press it down firmly and evenly. You want it packed enough to hold together as bars, but not so tight it becomes dense and cake-like.
- Bake until golden:
- Bake for 18 to 20 minutes—you're looking for the edges to turn golden brown while the center still looks slightly soft. They'll firm up as they cool, so resist the urge to bake them longer unless you want crunchy bars instead of chewy ones.
- Cool, cut, and store:
- Let them cool completely in the pan (this takes patience, I know), then lift the whole slab out using those parchment edges and cut into 12 bars with a sharp knife. Store them in an airtight container where they'll stay fresh and chewy for a week.
 Pinterest
 There was a moment during a busy Tuesday afternoon when I made a double batch of these and realized I'd accidentally created the perfect answer to my coworker's constant snack cravings and my own need to feel like I had my life somewhat together. Food has this quiet way of bridging the gap between effort and ease, and these bars sit right at that intersection.
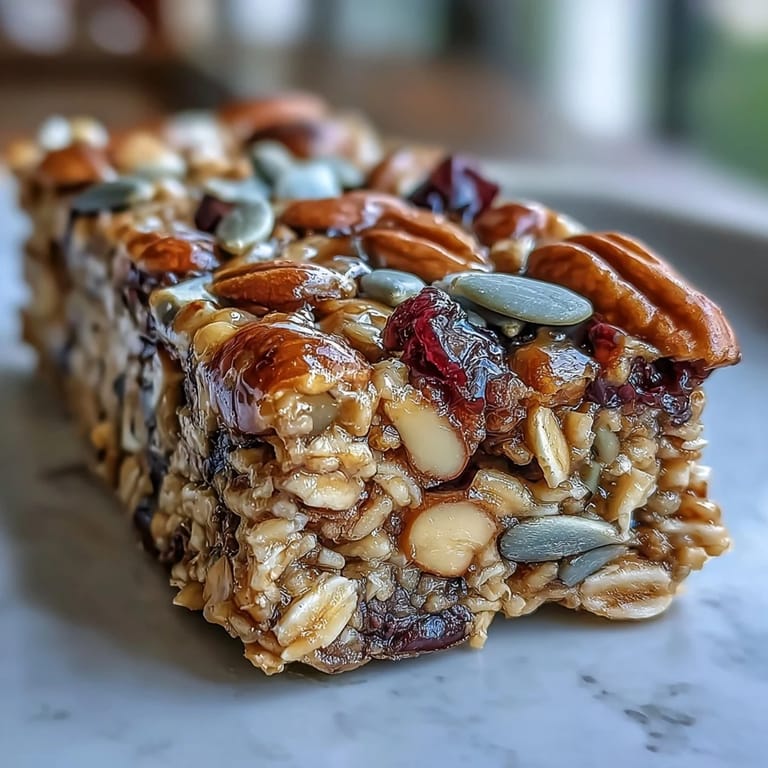
Customization is Your Superpower
The truth about these bars is that the formula works no matter what you throw at it, which means your kitchen pantry becomes the real recipe. Have cashews instead of almonds? Excellent choice. Found a random bag of coconut flakes? Stir them in. Love dried apricots more than cranberries? That's your bar, and it will be delicious. I've made batches with everything from macadamia nuts to pretzels, and every version has earned its place in someone's backpack or lunchbox.
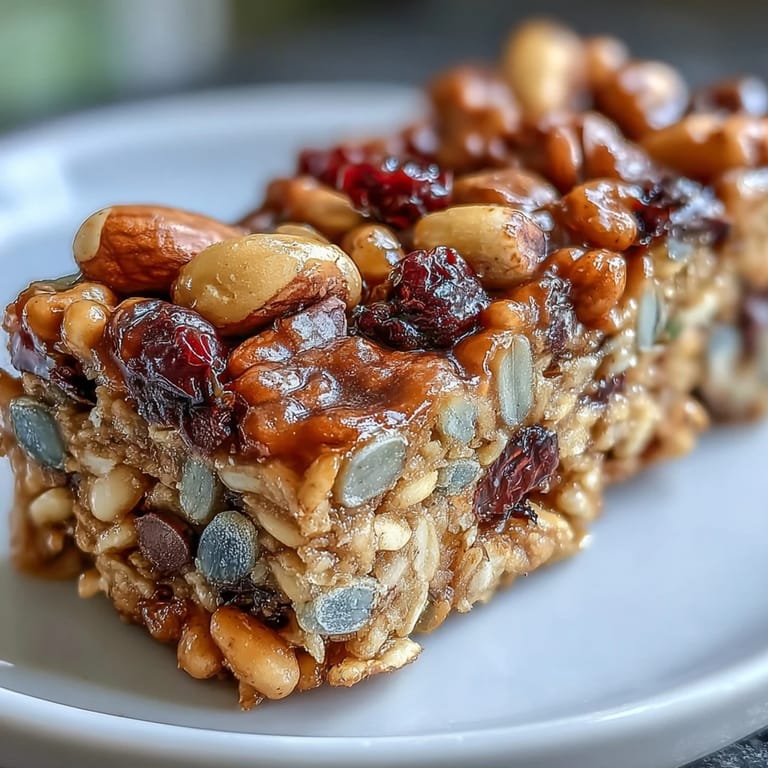
The Texture Game
The magic of these bars lives in the balance between chewiness and substance. The oats provide bulk and heartiness, the nuts and seeds add crunch and protein, and the honey creates that cohesive chewiness that holds it all together. If your bars feel too crumbly, it usually means the honey-butter mixture didn't fully coat everything—next time, stir a little longer. If they're too dense, you probably pressed them a bit too hard, which isn't a disaster but changes the eating experience.
Variations Worth Trying
Once you've made the basic version and found your footing, the fun part begins. I've drizzled them with melted dark chocolate, sprinkled sea salt on top before baking, and even added a thin layer of natural peanut butter as a surprise middle. For a vegan version, coconut oil and maple syrup swap in seamlessly for the butter and honey—the bars turn out slightly less rich but still deeply satisfying. The beautiful part is that you can't really mess this up, so feel brave about experimenting.
- Drizzle cooled bars with melted chocolate and let it set for an extra treat without the commitment of baking chocolate into them.
- Press a layer of nut butter into the pan before adding the mixture for a sneaky protein boost and flavor dimension.
- Sprinkle flaked sea salt or cinnamon on top before baking for complexity that makes people ask what your secret ingredient is.
 Pinterest
 These bars have become my answer to the question of what to bring to gatherings, what to grab when I need something real to eat, and what to make when I want to feel capable in the kitchen without much fuss. They're humble enough to be unpretentious but intentional enough to feel like you cared.
Recipe FAQs
- → What kind of nuts work best in these bars?
Almonds, walnuts, and pecans provide great texture and flavor, but you can mix your favorites for variety.
- → Can I substitute the seeds with others?
Yes, sunflower or pumpkin seeds are recommended, but chia or flaxseeds also work well as alternatives.
- → How do I make these bars vegan?
Replace butter with coconut oil and use maple syrup instead of honey to keep them plant-based.
- → What’s the best way to store the bars?
Keep them in an airtight container at room temperature for up to a week to retain freshness and chewiness.
- → Can I add chocolate to the bars?
Yes, mini chocolate chips can be mixed in or drizzle melted chocolate on top after baking for extra indulgence.