 Pinterest
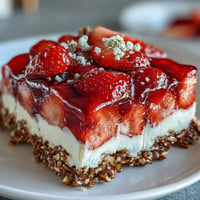
 My neighbor brought this pie to a Fourth of July potluck, and I remember standing in her kitchen watching her pull it from the fridge, this impossibly tall cloud of cream perched atop a golden crust that somehow smelled like both the tropics and my grandmother's kitchen. She caught me staring and laughed, saying it was just an icebox pie—nothing fancy—but that first bite proved otherwise. The guava filling hit with this perfect balance of tart and sweet, the macadamia crust offered an unexpected crunch, and the whipped cream melted like actual clouds on my tongue. I asked for the recipe that night, and now it's become the pie I make whenever I want to feel like summer all year round.
I made this the first time for my sister's birthday dinner, and I was so nervous about whether the filling would set properly that I checked the fridge approximately seventeen times. When I finally pulled it out and it was perfectly firm but still creamy, I felt this small victory that seemed ridiculous until I tasted it and realized why she's asked me to make it every single year since.
Ingredients
- Graham cracker crumbs: Use about ten to twelve full crackers, and if you pulse them in a food processor, you'll get a more consistent texture than crushing them by hand in a bag.
- Macadamia nuts, finely chopped: These are the star here—their buttery richness plays against the tartness of the guava better than any other nut would, but make sure they're fresh or they'll taste bitter.
- Granulated sugar (for crust): Just enough to balance the nuts and crackers without making the crust sweet.
- Unsalted butter, melted: The melted butter binds everything together, so use real butter and don't skip it.
- Guava juice (unsweetened or lightly sweetened): This is where the magic starts—the quality of your guava juice matters more than you'd think, so taste it first and adjust the sugar accordingly.
- Fresh lime juice: Don't use the bottled stuff; one fresh lime gives you about three tablespoons and makes a real difference in brightness.
- Granulated sugar (for filling): This sweetens the filling and works with the cornstarch to help it set properly.
- Large egg yolks: They thicken the filling and add richness, but they also mean you need to cook the mixture properly to pasteurize them.
- Cornstarch: This is your insurance policy against a runny pie—it thickens the filling without making it gelatinous if you use the right amount.
- Cream cheese, softened: Room temperature cream cheese whisks in smoothly and adds tang that cuts through the sweetness of the guava.
- Pure vanilla extract: Always real vanilla; the imitation stuff disappears into the background here.
- Heavy cream, chilled: Cold cream whips better and holds peaks longer, so keep it in the coldest part of your fridge until you're ready to use it.
- Powdered sugar (for topping): Powdered sugar dissolves easily into the cream without adding any grittiness.
- Vanilla extract (for topping): Just a teaspoon rounds out the sweetness of the whipped cream without being obvious about it.
Tired of Takeout? 🥡
Get 10 meals you can make faster than delivery arrives. Seriously.
One email. No spam. Unsubscribe anytime.
Instructions
- Heat your oven and gather your crust components:
- Preheat to 350°F and get all your dry ingredients into a medium bowl—the graham crumbs, chopped macadamia nuts, and sugar all together. You're building the foundation, so take a second and make sure the macadamia nuts are actually finely chopped and not just roughly broken.
- Bring the crust together with butter:
- Stir the melted butter into the dry mix until everything looks like wet sand—you should be able to squeeze a handful and have it hold together. If it's too crumbly, add another tablespoon of butter.
- Press it into your pie dish:
- Use the bottom of a measuring cup or your fingers to press the mixture evenly across the bottom and up the sides of a 9-inch pie dish. Make it about a quarter-inch thick all around, and don't worry if it's not perfect—it'll taste the same either way.
- Bake the crust until golden:
- Eight to ten minutes in the oven—you're looking for just a light golden color, not dark brown. Pull it out when the kitchen starts smelling like toasted nuts and butter, and let it cool completely on the counter.
- Combine your filling ingredients in a saucepan:
- Whisk together the guava juice, lime juice, granulated sugar, egg yolks, and cornstarch until there are no lumps. This is where your filling's success begins, so take your time with the whisking.
- Cook the filling over medium heat:
- Whisk constantly for about five to seven minutes until the mixture thickens and you see little bubbles breaking through the surface—this means the egg yolks are cooking safely and the cornstarch is doing its job. The moment it transitions from pourable to spreadable, you're done.
- Smooth in the cream cheese and vanilla:
- Remove from heat and whisk in the softened cream cheese and vanilla extract until everything is completely smooth with no lumps. If there are a few small bits of cream cheese, keep whisking and they'll disappear.
- Pour the filling into your cooled crust:
- Gently pour the guava mixture into the crust and smooth the top with a spatula. The contrast of the cool crust against the warm filling is actually nice if you catch it at that moment.
- Refrigerate until completely set:
- Cover with plastic wrap and refrigerate for at least four hours, ideally overnight. The filling will firm up gradually, and by the morning it'll have the texture of a cloud—dense enough to slice but still creamy.
- Whip your cream topping when ready to serve:
- Pour chilled heavy cream into a chilled bowl, add powdered sugar and vanilla, and whip with an electric mixer until stiff peaks form. This usually takes three to five minutes, and you'll know it's ready when you lift the beaters and the cream stands up straight.
- Top the pie with whipped cream:
- Spread or pipe the whipped cream over the chilled pie, and if you want to be fancy, garnish with extra macadamia nuts or a sprinkle of lime zest. Slice with a warm, clean knife for the prettiest presentation.
 Pinterest
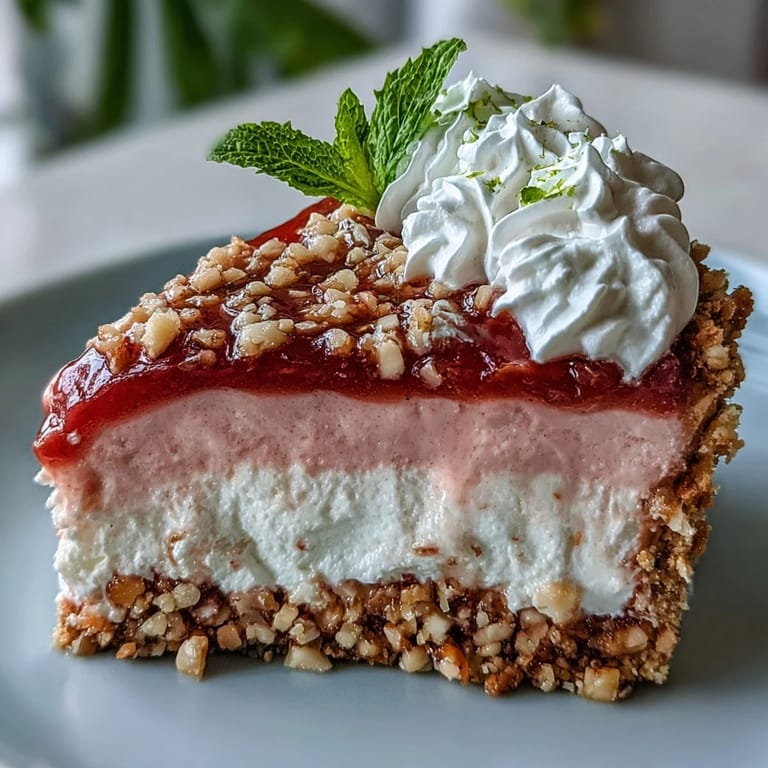
 My friend texted me a photo of this pie at her dinner party, and she'd added edible flowers around the whipped cream topping without telling me—I loved seeing how she'd made it her own. It reminded me that recipes are starting points, not rules, and the best part about making something for people is watching them put their own spin on it.
Why This Pie Works as a Make-Ahead Dessert
Icebox pies are the secret weapon of anyone who wants to look like they spent hours in the kitchen but didn't actually break a sweat. Everything gets made in one afternoon, then you forget about it while it chills, and by dinner time you have a restaurant-quality dessert waiting in your fridge. The filling actually improves as it sits because the flavors deepen and meld together, and the crust stays crispy instead of getting soggy like traditional cream pies sometimes do.
Playing with Flavors and Variations
Once you understand how this pie works, you can swap things around without breaking anything. I've made it with passion fruit juice instead of guava, and it was equally stunning in a different way. The macadamia crust is also forgiving enough that you could trade in half the macadamias for toasted coconut if you wanted to push the tropical theme even further, or even use almonds in a pinch.
Storage, Serving, and Last-Minute Saves
This pie keeps beautifully in the fridge for up to three days, and you can actually freeze the filling and crust separately for up to two months—just thaw overnight before whipping your cream topping. I learned the hard way that if you forget to chill your cream bowl, the whipped cream will take forever to form and might not hold peaks at all, so pop it in the freezer while you're plating other desserts. One small trick that changed everything for me: if your whipped cream starts to look grainy or splits, you've gone too far, so stop the mixer immediately and don't try to save it—just start fresh with new cream.
- Keep a spare can of whipped cream in the fridge as backup if you're serving this at a party.
- A warm knife dipped in hot water and wiped clean between slices gives you beautiful, clean cuts.
- If the pie sits out for more than an hour, the crust will start to soften, so keep it refrigerated until serving time.
 Pinterest
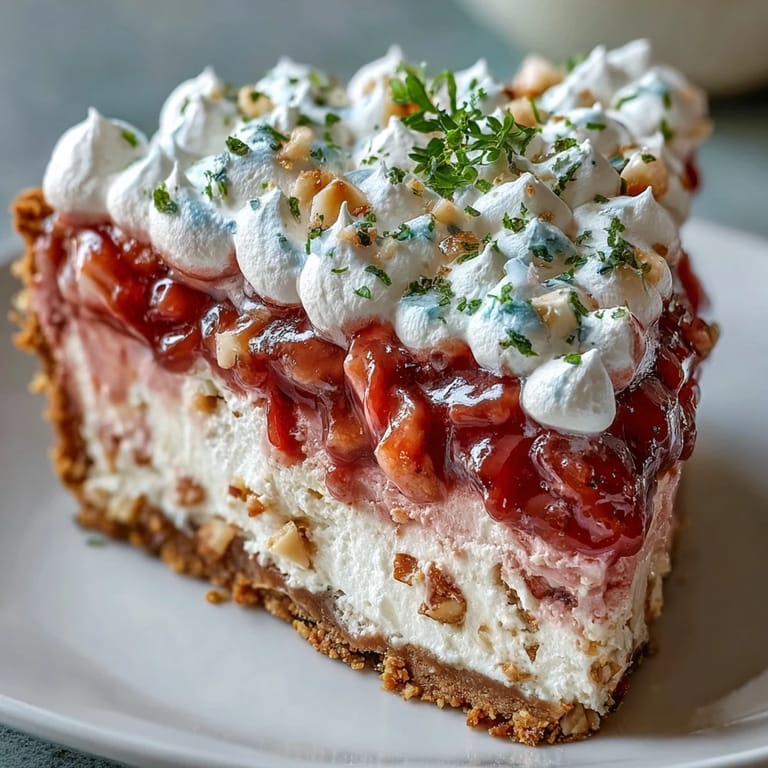
 This pie has become my answer to the question 'what should I bring' because it arrives looking like a dream and tastes like a vacation. Whether you're sharing it at a summer gathering or just keeping it in your fridge for quiet Thursday evenings, it has a way of turning an ordinary day into something a little bit special.
Recipe FAQs
- → What makes the crust uniquely flavorful?
The crust combines finely chopped macadamia nuts with graham cracker crumbs and butter, baked until golden for a crunchy texture with rich nutty notes.
- → How is the guava filling thickened?
Egg yolks and cornstarch are whisked into the guava and lime juices, then cooked over medium heat until the mixture thickens and becomes bubbly.
- → Can I prepare this dessert in advance?
Yes, the pie should be chilled for at least 4 hours or overnight for best texture. Whipped cream topping is best added just before serving.
- → What can I use to enhance the guava flavor?
Adding 1–2 tablespoons of guava puree into the filling brightens the tropical flavor without overpowering the balance.
- → Are there any allergy considerations?
This dessert contains nuts, dairy, eggs, and gluten; however, gluten-free graham crackers can be substituted to minimize gluten exposure.
- → What beverage pairs well with this dish?
The tropical flavors complement a chilled Moscato or fruity rosé, enhancing the overall tasting experience.