 Pinterest
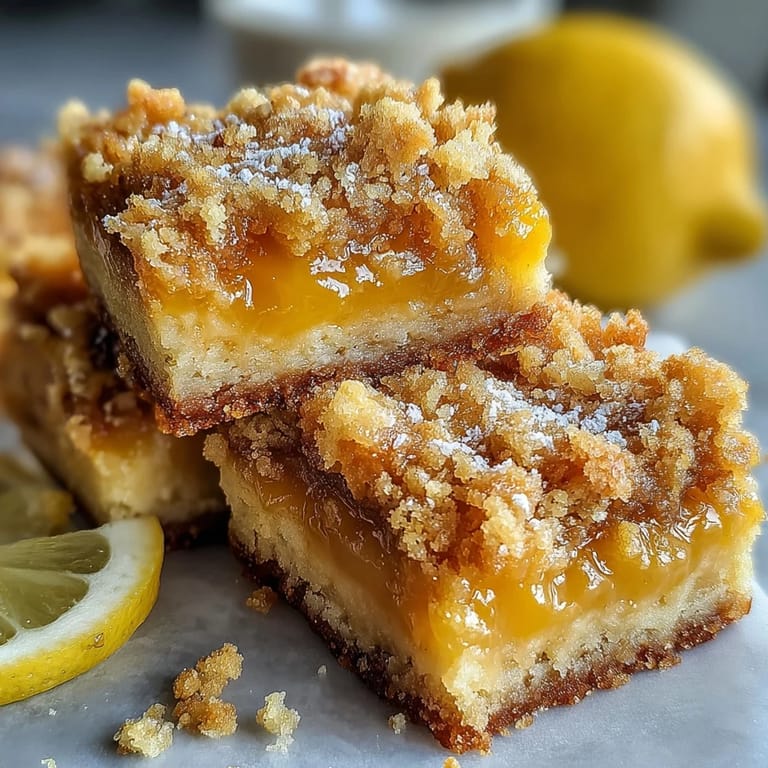
 My neighbor knocked on my kitchen window one July afternoon, holding a bag of lemons from her tree. I had no plan, no grand idea, just a craving for something sweet and sharp to cut through the summer heat. These bars came together almost by accident, the kind of recipe born from using what you have and trusting your instincts. The smell of lemon zest hitting warm butter filled the entire house, and by evening, half the pan was gone. I've been making them ever since, every time citrus season rolls around or someone needs a little brightness on their plate.
I brought these to a potluck once, still cool from the fridge, dusted with powdered sugar at the last second. A friend who usually skips dessert ate three squares and asked if I'd teach her how to make them. We spent the following Saturday in my kitchen, laughing as she zested a lemon for the first time and got more on her hands than in the bowl. That batch turned out even better than mine, maybe because she wasn't afraid to let the filling sit a little longer in the oven. Now she makes them for her book club, and every time I see the recipe, I think of her standing at my counter, whisk in hand, smiling like she'd just discovered magic.
Ingredients
- All-purpose flour (1 cup plus 1/4 cup): Forms the tender, crumbly base and topping, and also thickens the lemon filling just enough to set without turning gummy.
- Granulated sugar (1/2 cup plus 1 cup): Sweetens both the crust and the filling, balancing the bright acidity of fresh lemon juice so neither flavor overpowers the other.
- Baking powder (1/2 teaspoon plus 1/2 teaspoon): Gives a subtle lift to the crust and helps the filling puff just slightly as it bakes, creating a light, airy texture.
- Salt (1/4 teaspoon plus pinch): Sharpens all the flavors and keeps the sweetness from becoming flat or cloying, a small addition that makes a huge difference.
- Unsalted butter (1/2 cup, melted): Binds the crumbs together and adds rich, buttery flavor that contrasts beautifully with the tangy lemon.
- Large eggs (2): Provide structure to the filling, turning the lemon mixture into a custard-like layer that slices cleanly once chilled.
- Fresh lemon juice (1/4 cup): Delivers that unmistakable zing, far superior to bottled juice, with a brightness that tastes like sunshine.
- Lemon zest (from 1 lemon): Packs concentrated citrus oil into every bite, adding aromatic depth that juice alone can't achieve.
- Powdered sugar (optional, for dusting): A final flourish that makes the bars look bakery-perfect and adds a whisper of extra sweetness.
Tired of Takeout? 🥡
Get 10 meals you can make faster than delivery arrives. Seriously.
One email. No spam. Unsubscribe anytime.
Instructions
- Preheat and Prepare the Pan:
- Set your oven to 350°F and grease a 9x9-inch pan or line it with parchment, leaving some overhang for easy lifting later. This small step saves you from wrestling with stuck bars and makes cleanup a breeze.
- Mix the Crust and Crumb Base:
- Combine 1 cup flour, 1/2 cup sugar, 1/2 teaspoon baking powder, and 1/4 teaspoon salt in a bowl, then pour in the melted butter and stir until the mixture looks like damp sand. It should clump when you squeeze it but still feel crumbly and loose.
- Form the Crust:
- Set aside 1/2 cup of the crumb mixture for topping, then press the rest firmly and evenly into the bottom of your pan. Use the bottom of a measuring cup to smooth it out if your hands aren't getting it flat enough.
- Bake the Crust:
- Slide the pan into the oven for 10 to 12 minutes, just until the edges start to turn golden. You want it set but not deeply browned, as it will bake again with the filling on top.
- Whisk the Lemon Filling:
- In a large bowl, beat the eggs and 1 cup sugar together until smooth, then add the lemon juice, zest, 1/4 cup flour, 1/2 teaspoon baking powder, and a pinch of salt. Whisk until no lumps remain and the mixture is silky and pale yellow.
- Assemble and Top:
- Pour the lemon filling over the hot crust, spreading it gently to the edges, then sprinkle the reserved crumbs evenly over the top. The crumbs will sink slightly as they bake, creating pockets of buttery texture.
- Bake Until Set:
- Return the pan to the oven and bake for 20 to 25 minutes, until the filling no longer jiggles in the center and the topping is lightly golden. The edges may puff up slightly, which is normal and adds character.
- Cool and Chill:
- Let the bars cool in the pan on a wire rack for at least an hour, then transfer to the fridge for another hour or more. Chilling firms up the filling and makes slicing clean and effortless.
- Slice and Serve:
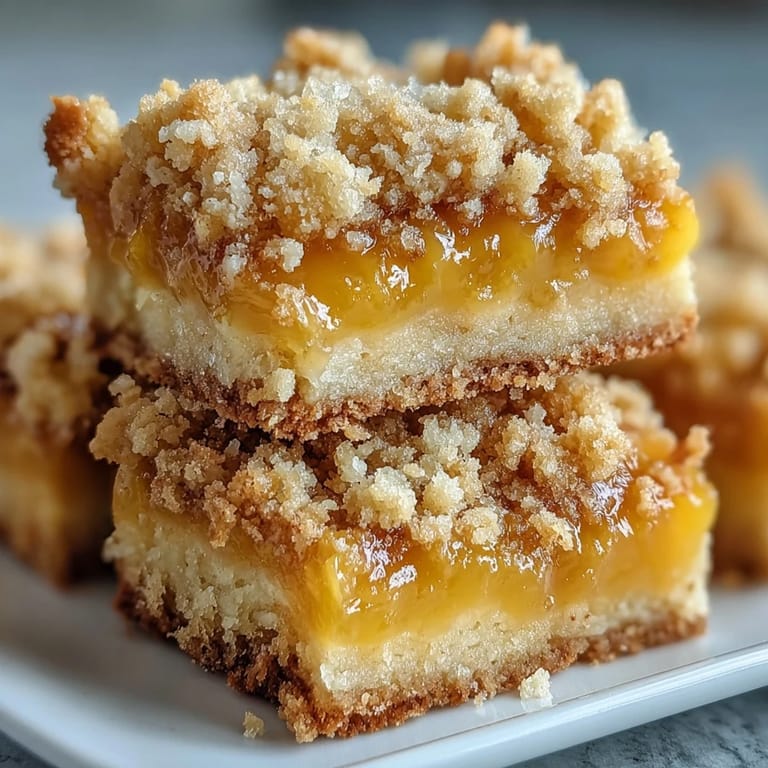
- Use a sharp knife, wiping it between cuts, to slice into 16 squares. Dust with powdered sugar right before serving for a pretty finish that melts slightly into the bars.
 Pinterest
 One spring, I made a double batch for a bake sale at my daughter's school. I watched kids and parents alike reach for them first, their faces lighting up after the first bite. A mom I barely knew came back later and slipped me five dollars, whispering that she wanted the recipe more than the bars themselves. I scribbled it on a napkin right there, and she still texts me photos every time she bakes them. It's funny how a simple dessert can connect strangers and turn into something people pass along, like a small piece of kindness wrapped in powdered sugar.
Storing and Keeping Them Fresh
These bars keep beautifully in an airtight container in the fridge for up to a week, though they rarely last that long in my house. The cold actually improves them, firming up the filling and letting the flavors meld together overnight. If you want to freeze them, wrap each bar individually in plastic wrap, then store in a freezer bag for up to three months. Thaw in the fridge for a few hours before serving, and they'll taste just as bright and buttery as the day you baked them.
Tweaks and Flavor Variations
Swap lime juice and zest for lemon if you want a slightly more tropical, floral tang that pairs wonderfully with coconut or ginger. You can also fold in a handful of fresh blueberries or raspberries into the filling before baking for bursts of fruity sweetness. I've even added a teaspoon of vanilla extract to the crust mixture when I'm feeling indulgent, and it adds a subtle warmth that plays nicely with the citrus. If you like things less sweet, cut the sugar in the filling by a quarter and let the lemon shine even brighter.
Serving Suggestions and Pairings
These bars are perfect alongside a hot cup of Earl Grey or a chilled glass of sweet white wine like Moscato, which echoes the citrus notes without competing. I love serving them at brunch with fresh berries on the side, or as a light finish to a heavy meal when you want something refreshing instead of rich. They also make a thoughtful homemade gift, stacked in a tin with parchment between the layers, delivered to a friend who needs a little sunshine.
- Pair with whipped cream or vanilla ice cream for an extra indulgent dessert moment.
- Serve at room temperature if you prefer a softer, more cake-like texture instead of firm and chilled.
- Pack them in lunchboxes or picnic baskets, as they travel well and don't require refrigeration for a few hours.
 Pinterest
 Every time I pull these bars from the fridge, I'm reminded that the best recipes aren't always the most complicated ones. They're the ones that make people smile, ask for seconds, and maybe even knock on your window hoping for more.
Recipe FAQs
- → How long should I chill the bars before serving?
Allow the bars to cool in the pan for at least 1 hour at room temperature, then refrigerate for 1 additional hour. This chilling time helps the filling set completely, making clean slices easier to achieve.
- → Can I use bottled lemon juice instead of fresh?
Fresh lemon juice provides the brightest flavor and natural acidity. Bottled juice works in a pinch, but may result in a slightly less vibrant citrus taste. For the best results, squeeze fresh lemons and use the zest for maximum flavor impact.
- → How should I store these lemon bars?
Store in an airtight container in the refrigerator for up to one week. The cool temperature keeps the filling firm and fresh. You can also freeze them for up to 3 months—wrap individual pieces in plastic wrap and place in a freezer-safe bag.
- → Why did my filling turn out runny?
Runny filling usually means insufficient baking time or inadequate chilling. Bake until the center is set and no longer jiggles when you gently shake the pan. The crucial chilling step—2 hours total—helps the filling firm up properly before slicing.
- → Can I make these with other citrus fruits?
Absolutely! Lime juice and zest make an excellent variation, yielding green-hued bars with a tart, tropical twist. You could also try grapefruit, orange, or a blend of citrus fruits. Keep the ratios the same for consistent texture.
- → What's the best way to get clean, neat slices?
Chilling thoroughly is key—use a sharp knife wiped clean between cuts. For extra precision, lift the entire batch out of the pan using parchment paper overhang, then slice on a cutting board. A warm knife dipped in hot water also helps create smooth edges.